
Prerequisites
Ensure that you have access to the payment system and the necessary permissions to perform bulk actions.
Have accurate and complete beneficiary information ready, including details such as account numbers, beneficiary types, names, dates of birth (if applicable), IBAN, and address information.
Navigating to Bulk Add Beneficiaries
To start the process to bulk create beneficiaries, select the option Payments-> Beneficiaries -> Bulk Add Beneficiaries from the menu options.

Download Sample CSV File
In the “Step 1” section of the page, click on the “Download Sample CSV” button to download the CSV (Comma-Separated Values) Bulk Add Beneficiaries template file.
- This file serves as a template for entering beneficiary information.

Populate CSV Template
Open the CSV file in an appropriate editor.
Important: Please note that if you use Excel you will need to ensure that the cells are formatted as “text” so that Excel does not remove leading zeros. For example, 0001 will be converted to 1 in Excel if the format for the cell is not set to “text”
The columns you need to populate are detailed below.
CSV File Format
When filling in the CSV file for bulk beneficiary upload, ensure that each row corresponds to a single beneficiary. The following are the required fields, and each field has specific instructions on how to input the information:
| Field | Description | Example |
|---|---|---|
| LinkToAccountNumber | Use this field to link the beneficiary to the account number. Enter the relevant account number to establish the connection. Note that for current accounts, this must be the full IBAN. | |
| BeneficiaryType | Specify the type of beneficiary. Possible values could include “Individual” (natural person) or “Business”. | |
| FirstName | For beneficiaries of type “Individual”, enter the first name of the person. Leave blank if the beneficiary is a business entity. | |
| LastName | For beneficiaries of type “Individual”, enter the last name of the person. Leave blank if the beneficiary is a business entity. | |
| DOB | Date of Birth. Applicable only to Individual type beneficiaries. Enter the date of birth in the format YYYY-MM-DD. | |
| BusinessName | For business beneficiaries, enter the full legal name of the business. Leave blank if the beneficiary is an individual. | |
| AccountName | Enter the account name of the beneficiary. This could be the account holder’s name or the business name. | |
| NickName | Provide a nickname or alias for the beneficiary for easy reference. This field can be left blank if not applicable. | |
| IBAN | Input the International Bank Account Number (IBAN) associated with the beneficiary’s account. If you don’t know the IBAN, you can leave this blank and use the Sort Code and Account Number fields instead. | |
| SortCode | Enter the sort code of the beneficiary’s bank. | |
| AccountNumber | Specify the account number of the beneficiary. | |
| Country | Enter the country where the beneficiary is located. | |
| StateDistrict | Provide the state or district information, if applicable. | |
| TownName | Enter the Beneficiary’s town or city. | |
| StreetName | Enter the street name or area information. | |
| BuildingNumber | Specify the building number, if applicable. | |
| BuildingName | Enter the name of the building or property, if applicable. | |
| PostCode | Input the postal code or ZIP code associated with the beneficiary’s address. |
Once completed, check your CSV file and ensure that you are saving it as a CSV, and that leading zeros have not been removed. Save your file ready for the next step.
Select Beneficiary Data File
In the “Step 1” section of the page, click on the “Select file” button which will open a file selection dialogue box. Choose the CSV file containing the beneficiary’s information you created earlier from your device.
Validation
In the “Step 2” section, the system will validate the uploaded file to ensure the data is correct and properly formatted.
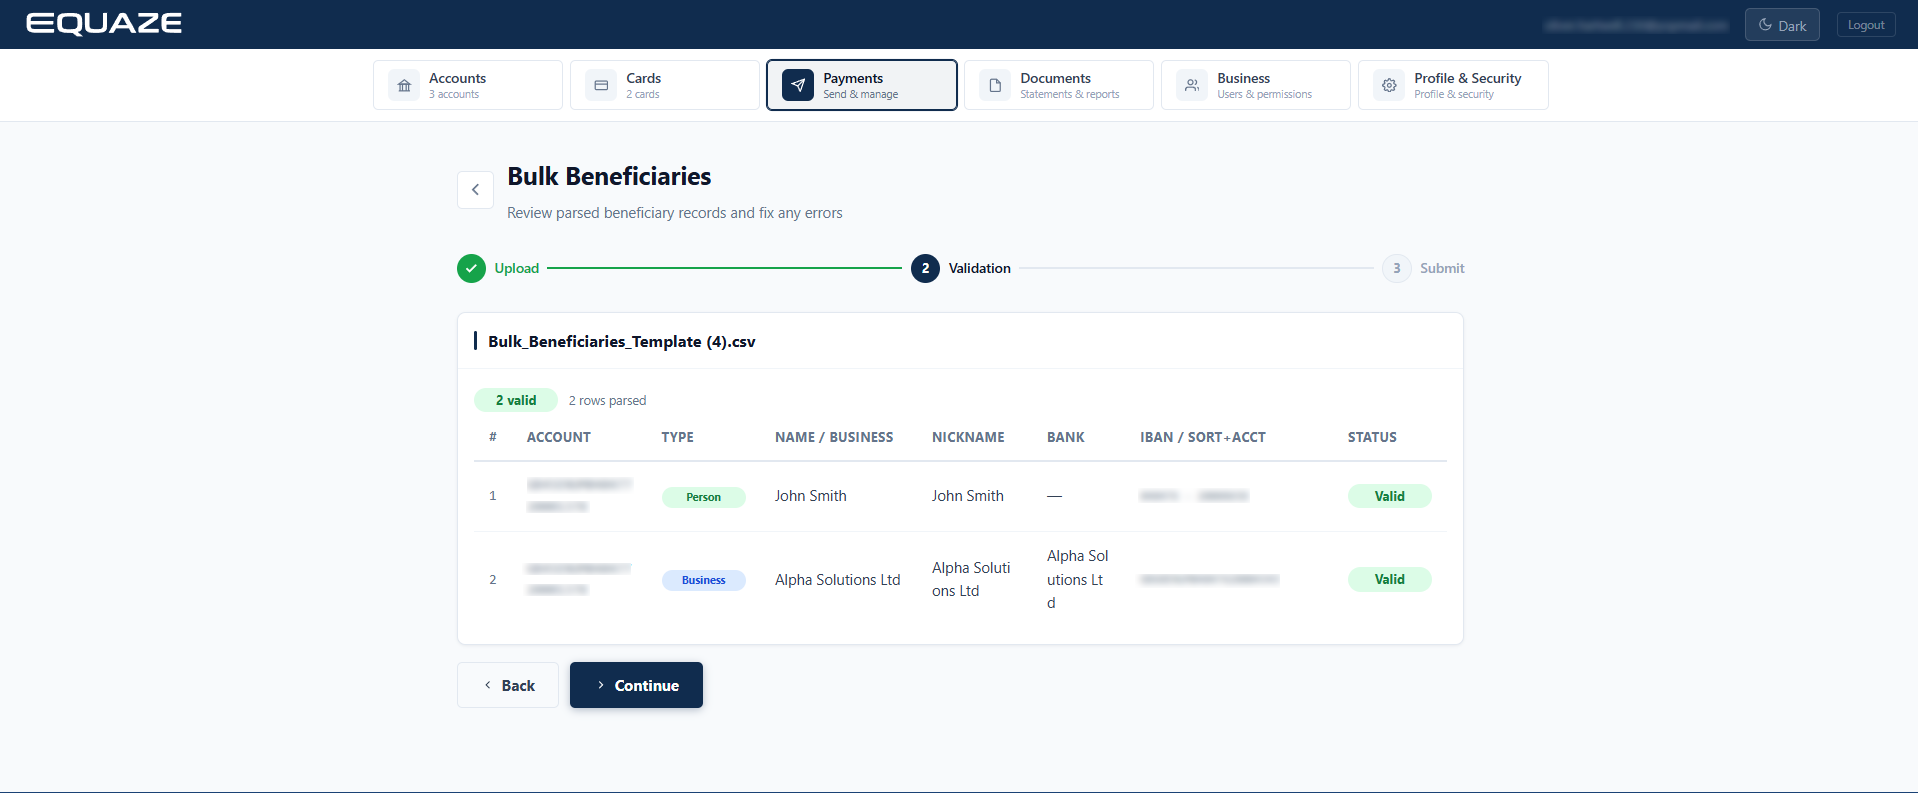
Submit
Once validation is complete, proceed to “Step 3” and click the submit button to upload the beneficiaries. A success notification will be displayed at the bottom of the page once the beneficiaries have been successfully submitted.
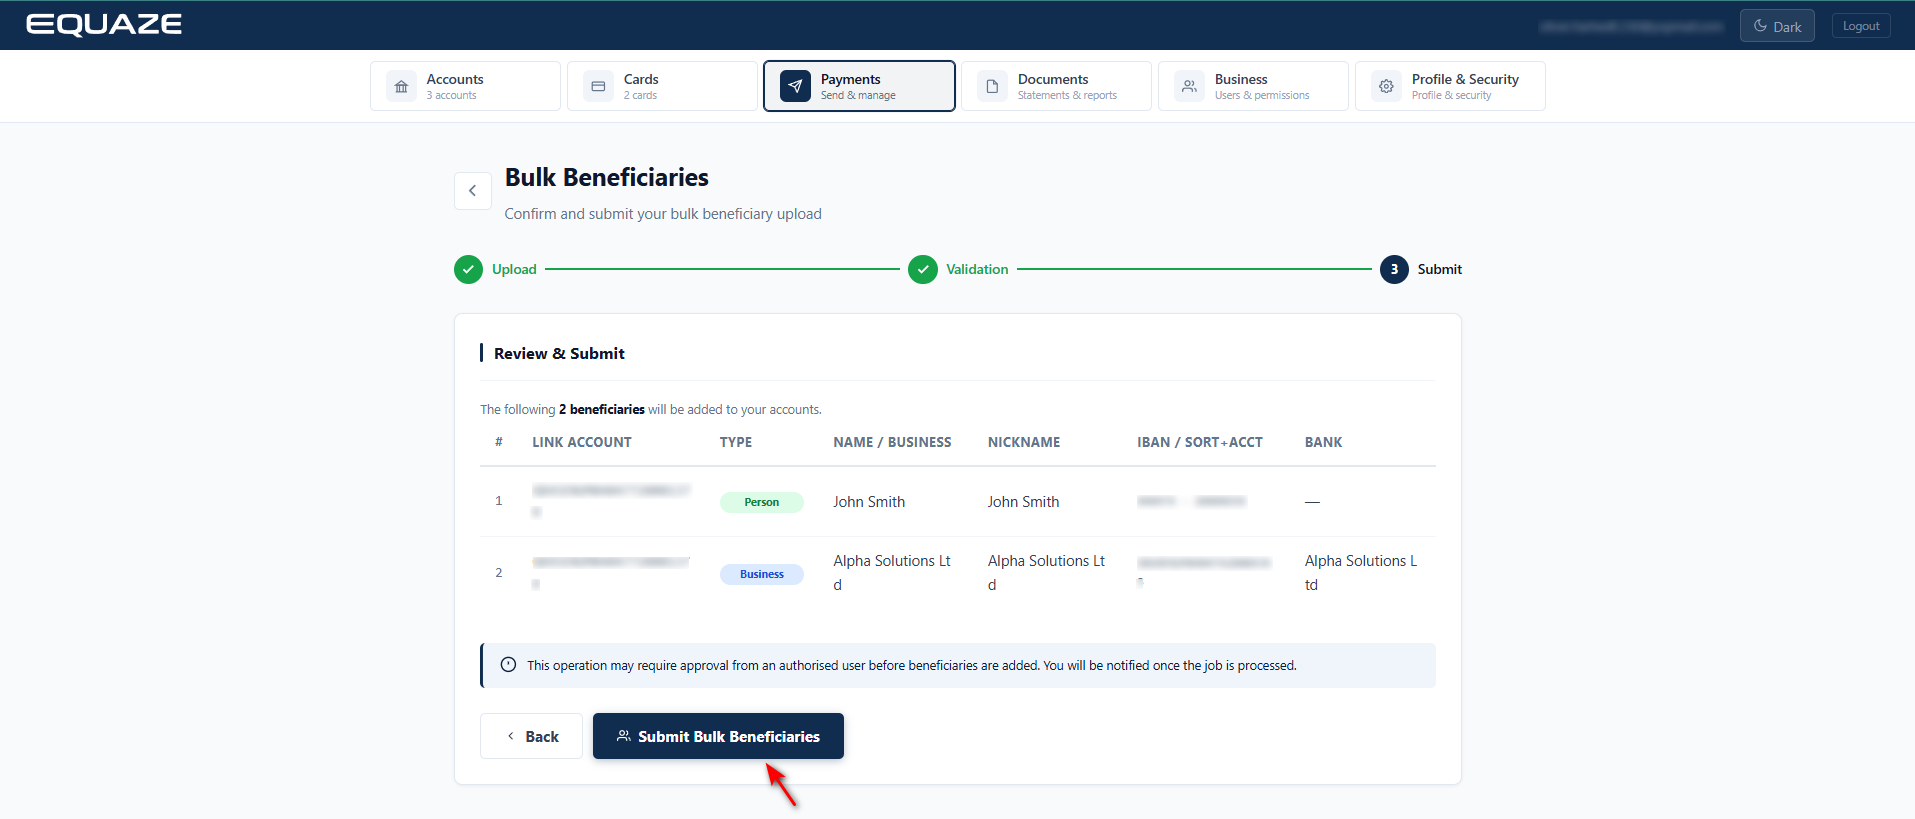
After a successful submission, click “Back to Beneficiaries” to return to the beneficiaries list, where the newly added beneficiaries will be displayed in the grid.
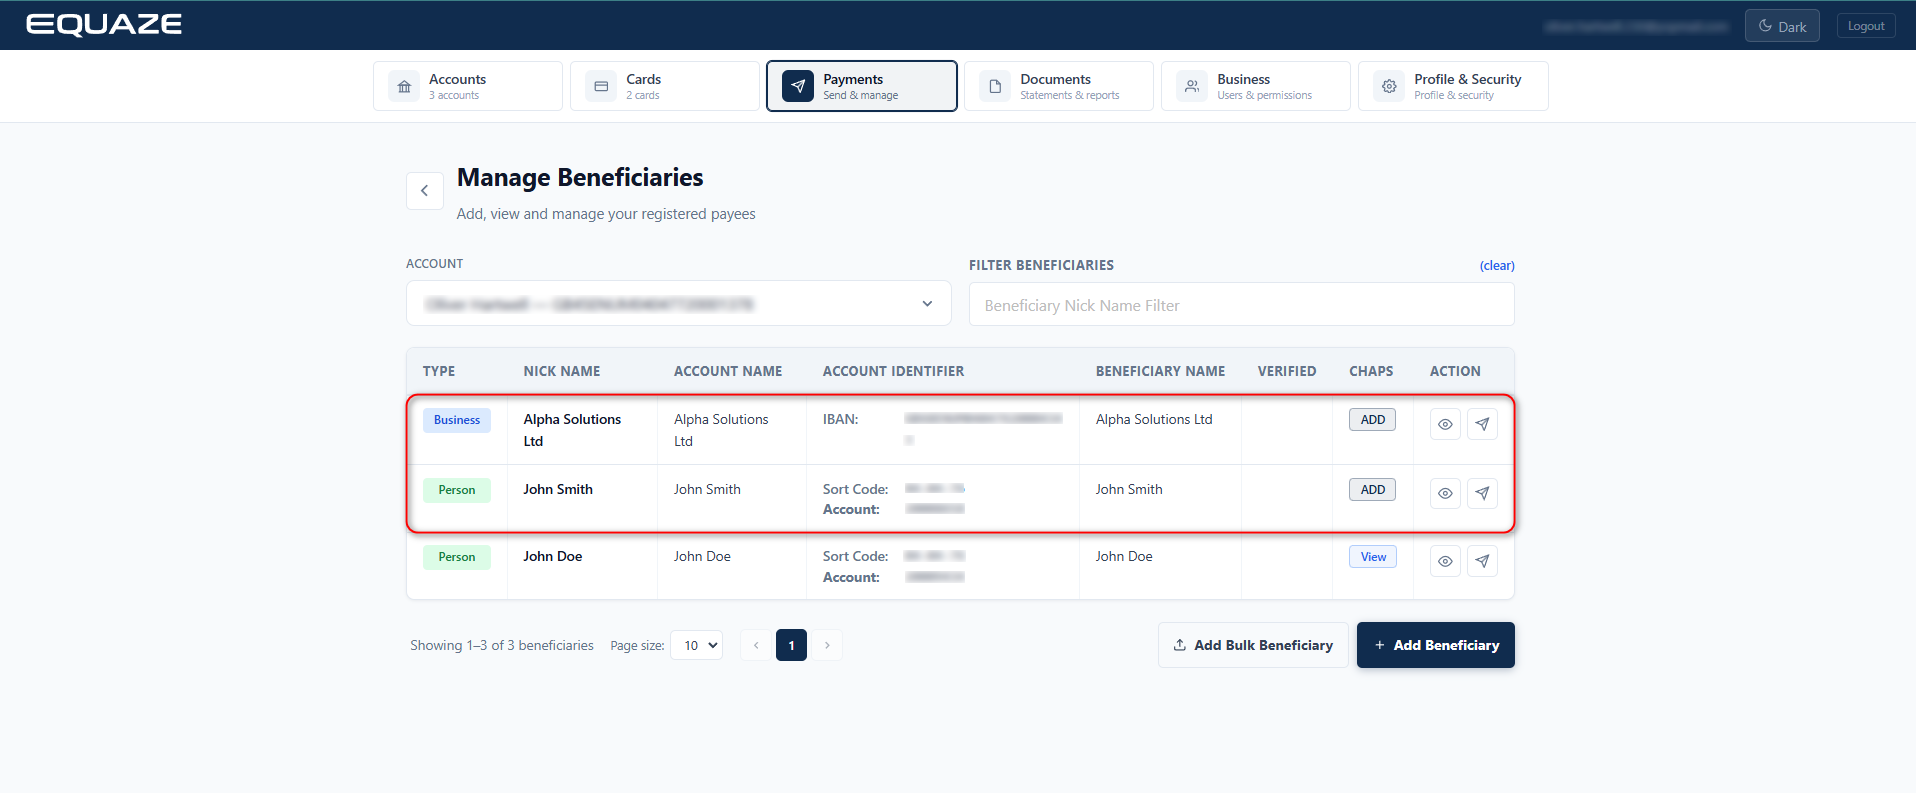
Note: The Bulk Add Beneficiary function is only supported on desktop and is not available on mobile.


